개발공부 20일차 [노마드코드 크롭앱 만들기]
const h1 = document.querySelector("div.hello:first-child h1");

console.dir(title);
title.style.color = "blue";
자바스크립트에서 h1의 색깔도 변경 가능하다.
click event
addEventListener이용
const h1 = document.querySelector("div.hello:first-child h1");

function handleTitleClick(){
	console.log("title was clicked!")
}

h1.addEventListener("click", handleTitleClick)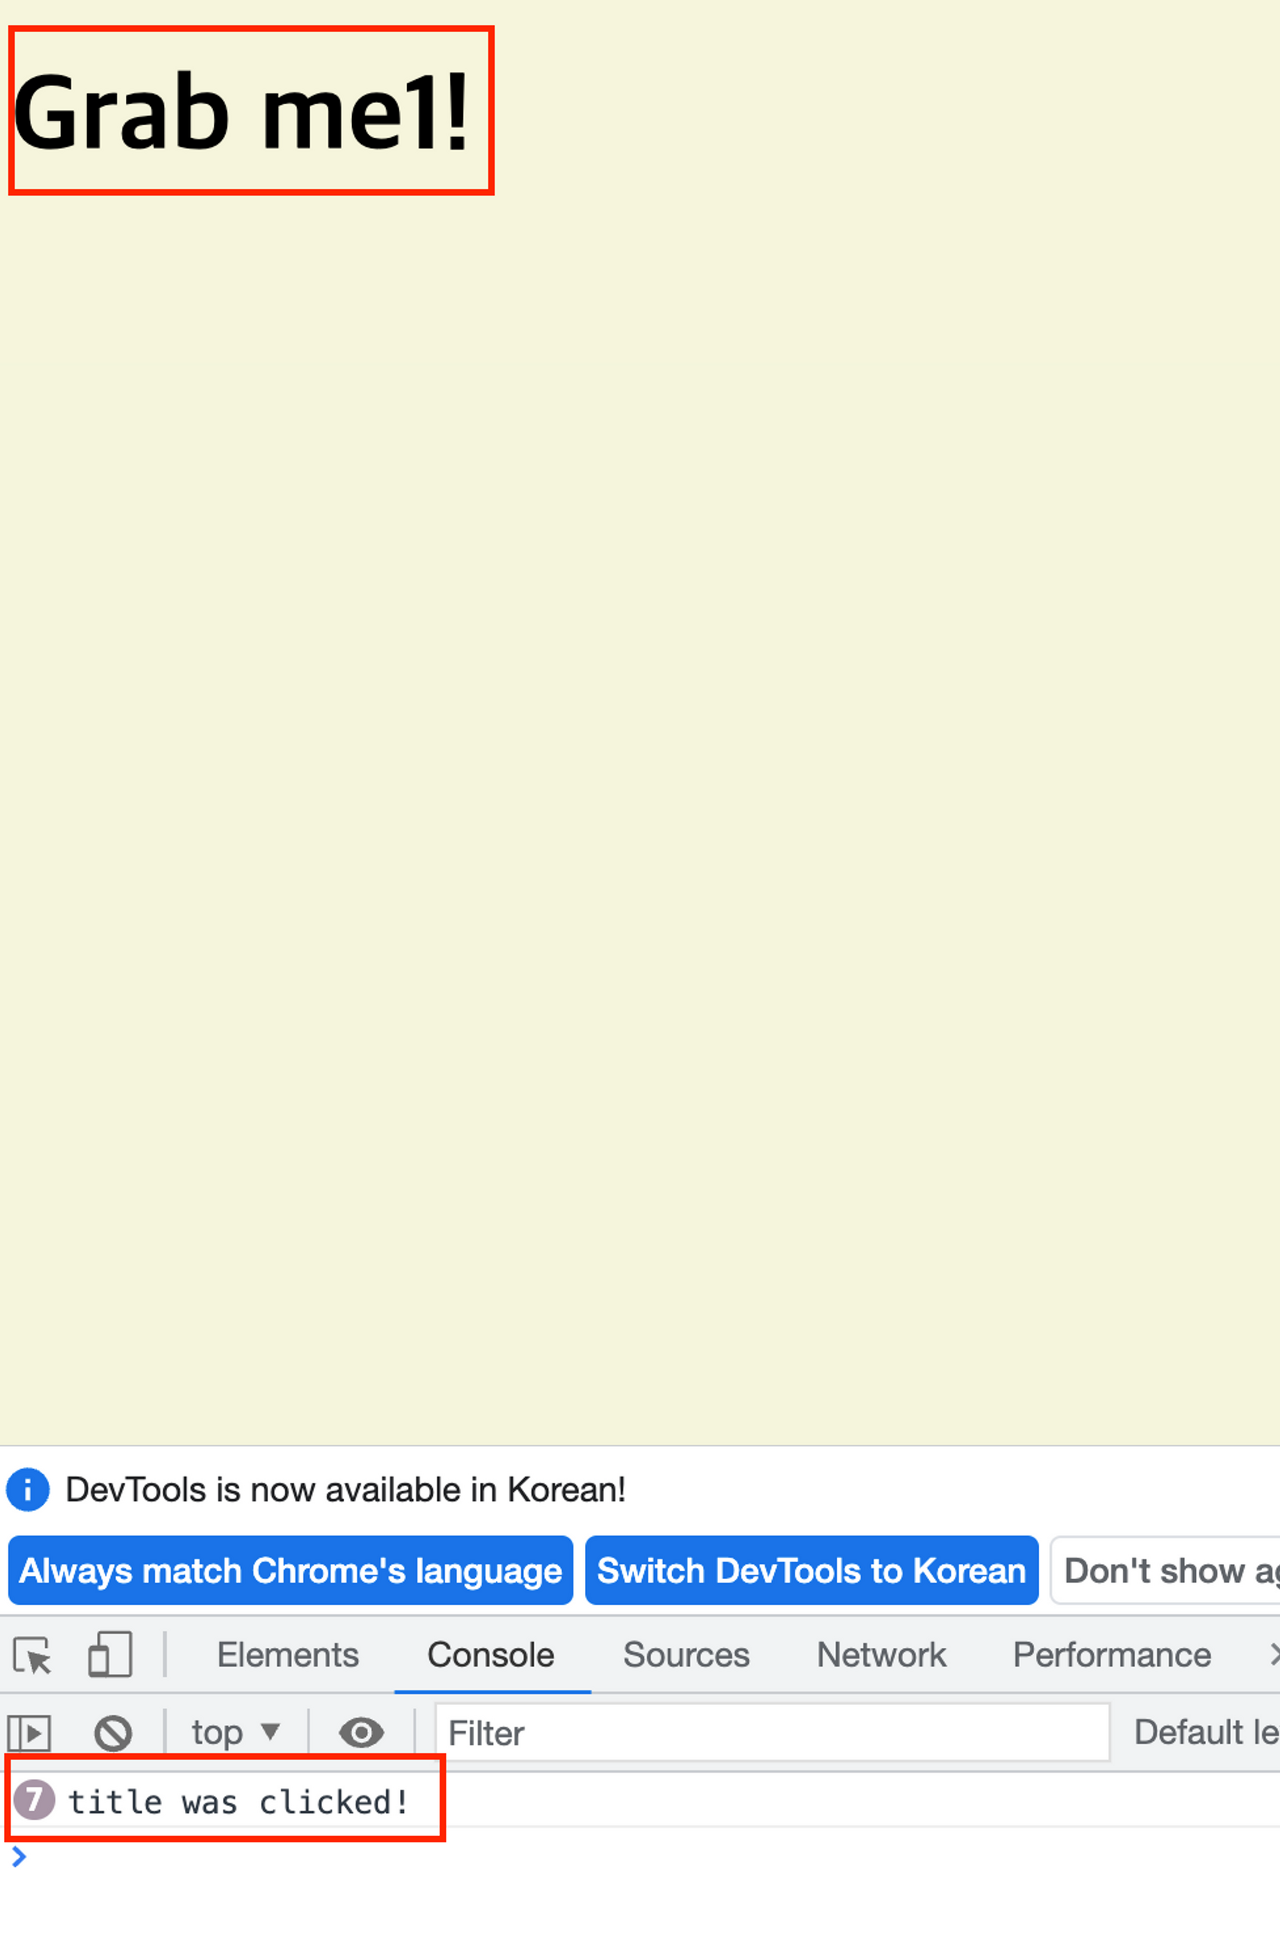
Grab me1!를 클릭했을때만 handleTitleClick 함수가 실행 될 수 있도록 설정 가능하다.
버튼을 만들지 않아도 원하는 위치의 클릭만으로도 이벤트가 발동할 수 있다.
function을 실행시키지 않고 자바스크립트에 넘겨만줘서 유저가 클릭할때만 실행이 되도록 한다.
응용
const h1 = document.querySelector("div.hello:first-child h1");

function handleTitleClick(){
	h1.style.color = "blue";
}

h1.addEventListener("click", handleTitleClick)
h1의 내용을 클릭했을때 폰트색깔이 블루로 변한다.
listen 하고 싶은 event를 찾는 가장 좋은 방법
- h1 html(찾고싶은 element의 이름) element mdn
검색 후 링크에 Web APIs를 찾는다. → JavaScript관점의 HTML Heading Element
https://developer.mozilla.org/en-US/docs/Web/API/HTMLElement - console.dir()를 검색한다.
검색목록중 on으로 시작되는 element가 listen 가능한 element다.
const h1 = document.querySelector("div.hello:first-child h1");

function handleTitleClick(){
	h1.style.color = "blue";
}

function handleMouseEnter(){
	h1.innerText="mouse is here!"
}

function handleMouseLeave(){
	h1.innerText = "mouse is gonw!"
}

h1.addEventListener("click", handleTitleClick)
h1.addEventListener("mouseenter", handleMouseEnter)
h1.addEventListener("mouseleave", handleMouseLeave)
mouseenter 마우스를 title에 가져다놓으면 h1이 mouse is here!로 변경이되고
mouseleave 마우스를 title바깥으로 가져다 놓으면 h1이 mouse is gonw!로 변경이 된다.
다른 방법으로는
h1.onclick = handleTitleClick
h1.onmouseenter = handleMouseEnter
h1.onmouseleave = handleMouseLeave
이렇게 써도 정상적으로 실행이 가능하나
title.addEventListener("mouseleave", handleMouseLeave)
이렇게 사용해야 나중에 .removeEventListener로 event listener를 제거 할 수 있다.
resize
창의 크기가 조정되었을 때 발생합니다. 속성을 통해서도 가능하다. [onresize](<https://developer.mozilla.org/en-US/docs/Web/API/Window/resize_event>).
function hendleWindowResize(){
	document.body.style.backgroundColor = "tomato";
}

window.addEventListener("resize", hendleWindowResize)
창의 크기가 조정되었을 때 배경색이 tomato색으로 변한다.
function haneleWindowCopy(){
	alert("copier!")
}
window.addEventListener("copy", haneleWindowCopy)
복사를 했을때 copier! 적혀있는 팝업창이 뜬다.
function handleWindowOffline(){
	alert("SOS no WIFI")
}

function handleWindowOnline(){
	alert("ALL goood!")
}

window.addEventListener("offline",handleWindowOffline)
window.addEventListener("online", handleWindowOnline)
Wifi연결이 끊켰을때 “SOS no WIFI” 적혀있는 팝업창이 뜨고
Wifi연결이 되었을대 "ALL goood!" 적혀있는 팝업창이 뜬다.
const h1 = document.querySelector("div.hello:first-child h1");

function handleTitleClick(){
	const currentColor = h1.style.color;
	let newColor;
	if(currentColor === "blue"){
		newColor = "tomato"
	} else {
		newColor = "blue"
	}
	h1.style.color = newColor;
}

h1.addEventListener("click", handleTitleClick)
const currentColor = h1.style.color;
let newColor; → 클릭할때마다 색이 변하려면 const가 아닌 let으로 넣어줘야 한다.
→h1.style.color가 블루라면 폰트색을 tomato로 바뀌고 아니라면 blue가 나온다.
body{
  background-color: beige;
}

h1{
  color: cornflowerblue;
}

.active{
  color:tomato;
}
const h1 = document.querySelector("div.hello:first-child h1");
function handleTitleClick(){
if(h1.className === "active"){
h1.className = "";
} else{
h1.className = "active";
}
}
h1.addEventListener("click", handleTitleClick);css 파일에 먼저 변경할걸 넣어주고
Javascript에 조건을 넣어준다.
h1.className 이 active이면 h1의 className을 비워주고
h1.className 이 active가 아니라면 h1의 className을 active라고해서
css에 active는 폰트컬러 tomato가 실행되도록 한다.
위 내용처럼 해도 정상 작동은 하지만 active는 우리가 지정해준 이름이기 때문에 오타 및 에러가 날 확률이 너무 높다.
function handleTitleClick(){
	const activeName = "active"
	if(h1.className === activeName){
		h1.className = "";
	} else{
		h1.className = activeName;
	}
}
active를 변수 activeName에 넣고 사용을 하면 오타를 줄여주고 수정도 쉬워진다.
이처럼 하게되면 버그가 하나 생기게되는데 className은 말그대로 클래스 이름을바꿔버리는데 h1에 원래 있던 class 이름이 없어지고 active라는 클래스이름으로 변경해버린다.
const h1 = document.querySelector("div.hello:first-child h1");

function handleTitleClick(){
	const activeName = "active"
	if(h1.classList.contains(activeName)){
		h1.classList.remove(activeName);
	} else{
		h1.classList.add(activeName)
	}
}

h1.addEventListener("click", handleTitleClick);
h1.classList.contains(activeName)
→ classList가 active를 포함하고 있는지 확인한다.
active 포함하면 classList.remove(activeName)로 active라는 이름을 지워주고
포함하지 않는다면 lassList.add(activeName)로 active라는 이름을 넣어준다.
toggle
- toggle은 h1의 classList에 active라는 class가 이미 있는지 확인해서 만약 있다면 class를 지워준다.
- 만약 h1의 classList에 active가 존재하지 않는다면 toggle은 active를 classList에 추가를 해준다.
const h1 = document.querySelector("div.hello:first-child h1");

function handleTitleClick(){
	h1.classList.toggle("active");
}

h1.addEventListener("click", handleTitleClick);
이렇게만 입력해도 위에 조건문으로 만든거랑 똑같이 반응한다.
여기까지 듣고 벙쪘다...
토글하나로 다섯줄이 한줄이됬다......대단하다...
분명 자세하게 다른방법으로 써도 가능하다는걸 알고 넘어가야 좋은거겠지만 .. ㅠㅜㅠ한줄로 스위치처럼 되다니...말도안뒈ㅔㅔㅔ....아안뒈에....